
Consulting company
💡Thanks to its flexibility, Timezynk is an excellent choice for companies in a variety of industries, such as healthcare, recruitment, consulting and management services, hospitality, and the real estate sector.
While some companies thrive with Timezynk's default settings, there are also businesses that need to customize the system according to their specific needs.
Below is a guide on how consulting firms can adjust their settings to achieve the best possible results.
Settings for a consulting firm
In order to operate efficiently, a consulting firm usually needs to manage several different projects and tasks simultaneously, often distributed across multiple clients. For scheduling to be carried out smoothly and reliably, a clear overview and relevant, up-to-date information are required. In the example below, we take a closer look at a consulting firm using Timezynk and describe how they work to simplify their scheduling and create better conditions for planning.
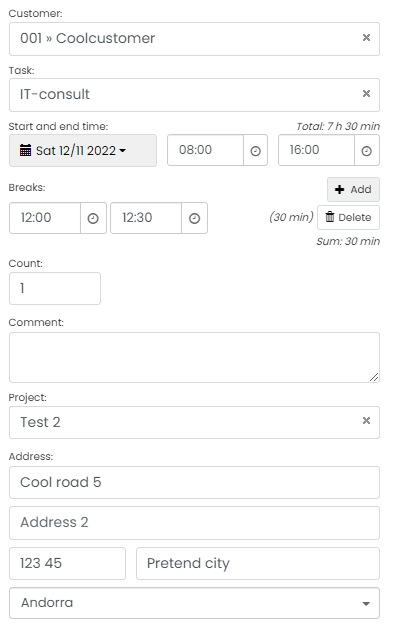
👀In this example, Coco works for Client1 as an IT consultant on a project, Project 1. Based on the time entry information, Coco can see details about the start and end time, break, client, project, and the address of the workplace. The address also creates a link that she can click on if she needs directions.
Add the project register field to your shifts
- Go to Register settings and click on the title Shift.
- Click on + Add, select Type and scroll down to Register. Then select Project and save.
Note that you need to have created a register called Project before you do the above.
Add an address field
- Just like in the previous step, you will create a new field under Pass in the registry settings.
- When selecting the field, choose Address under General.
- If necessary, you can adjust the title of the address field.
Make the customer address field visible on the shift (optional)
If your customers always have the same address for their projects, you can add an address field directly on the shift by doing the following:
- In Registry Settings, go to the Customer registry.
- Click on Edit for the address you want to be visible on the shift.
- Check the box Show in linked registries and click save.
Configure a combined heading for the pass
In the example above, the header only contains the customer's name. However, it is possible for the header to display more information about the shift.
- Navigate to Registry Settings and click on Shift. At the top, you will find the field for a combined heading.
- Click on the field and select from the menu which combination of information suits you best.
Change the order of the fields in your shifts (optional)
- You can drag and drop the fields to change their order. Do this by pressing the icon to the left of the field (6 small dots in two rows) and then dragging the field up or down.