
Create an invoice agreement
Start by clicking on ⚙️ at the top right corner, then click on Invoice Agreement under Invoice.
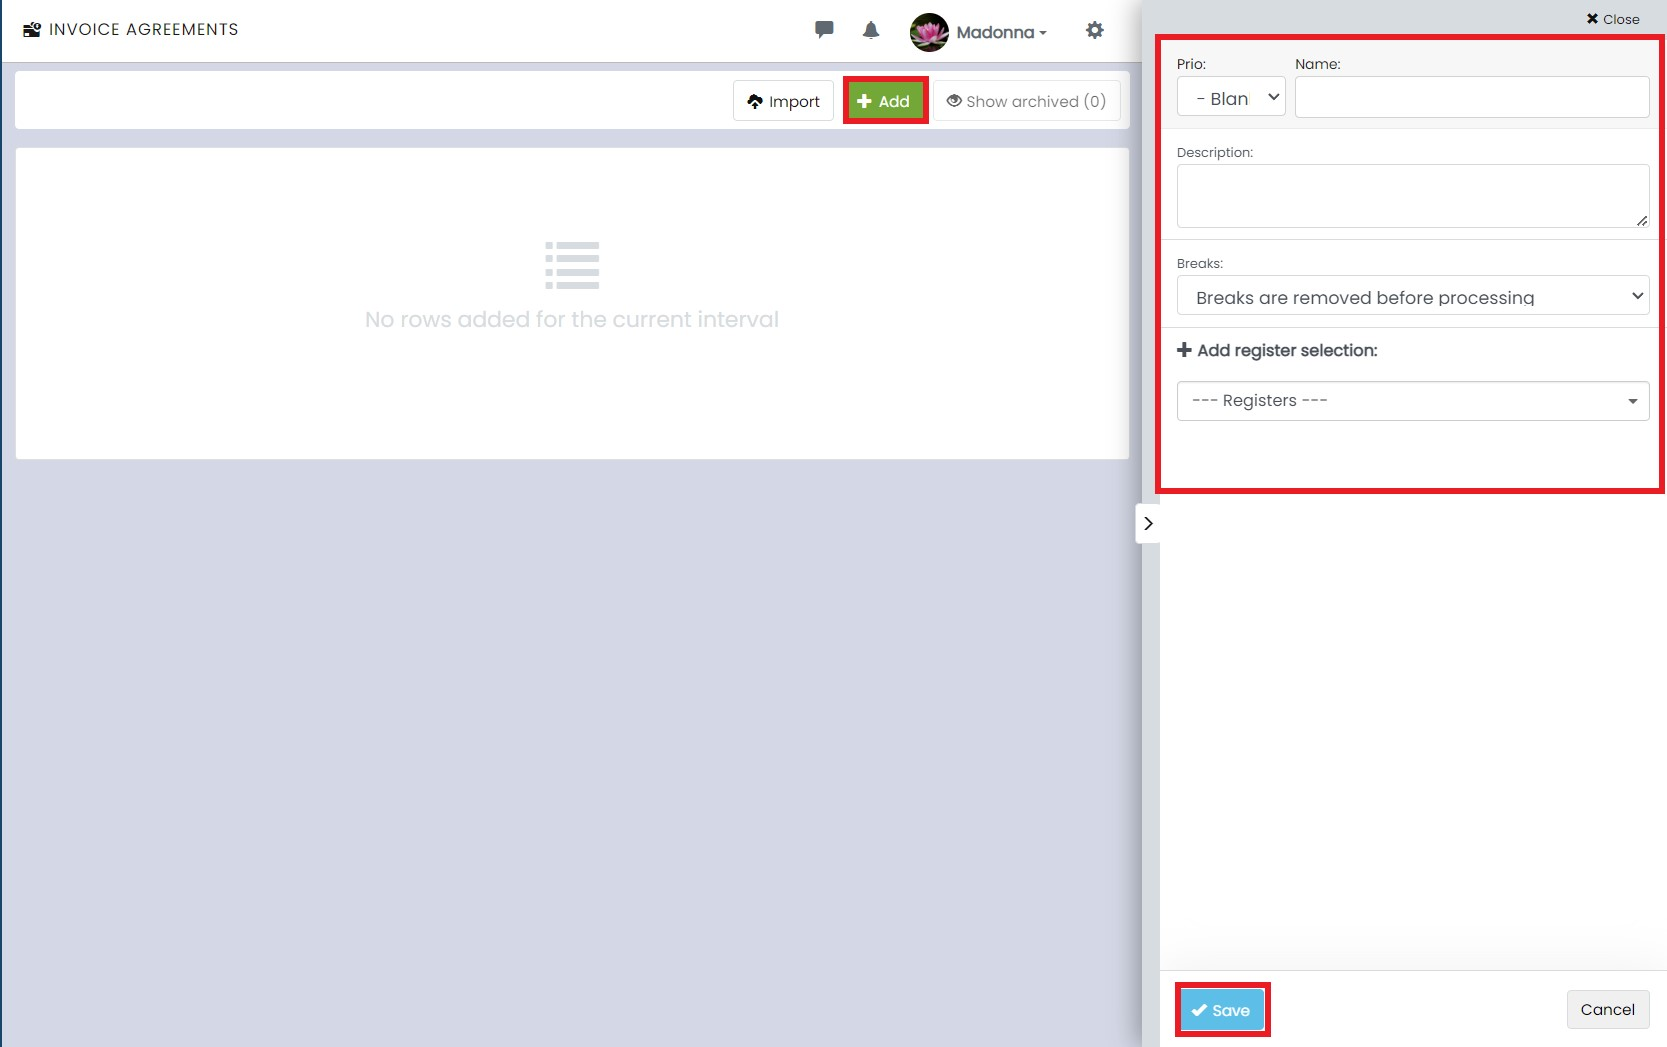
To add a new agreement, click on + Add, name the agreement, choose whether breaks should be used in the agreement or not, add register filters, and Save.

Create a new rule group
Each agreement consists of a number of rule groups that determine which invoice articles your approved time reports should match with. These rules can, for example, be linked to days of the week, time intervals, tasks, clients, absence or presence, etc.
To create a new rule group in the agreement, name it and click the blue button +Create.
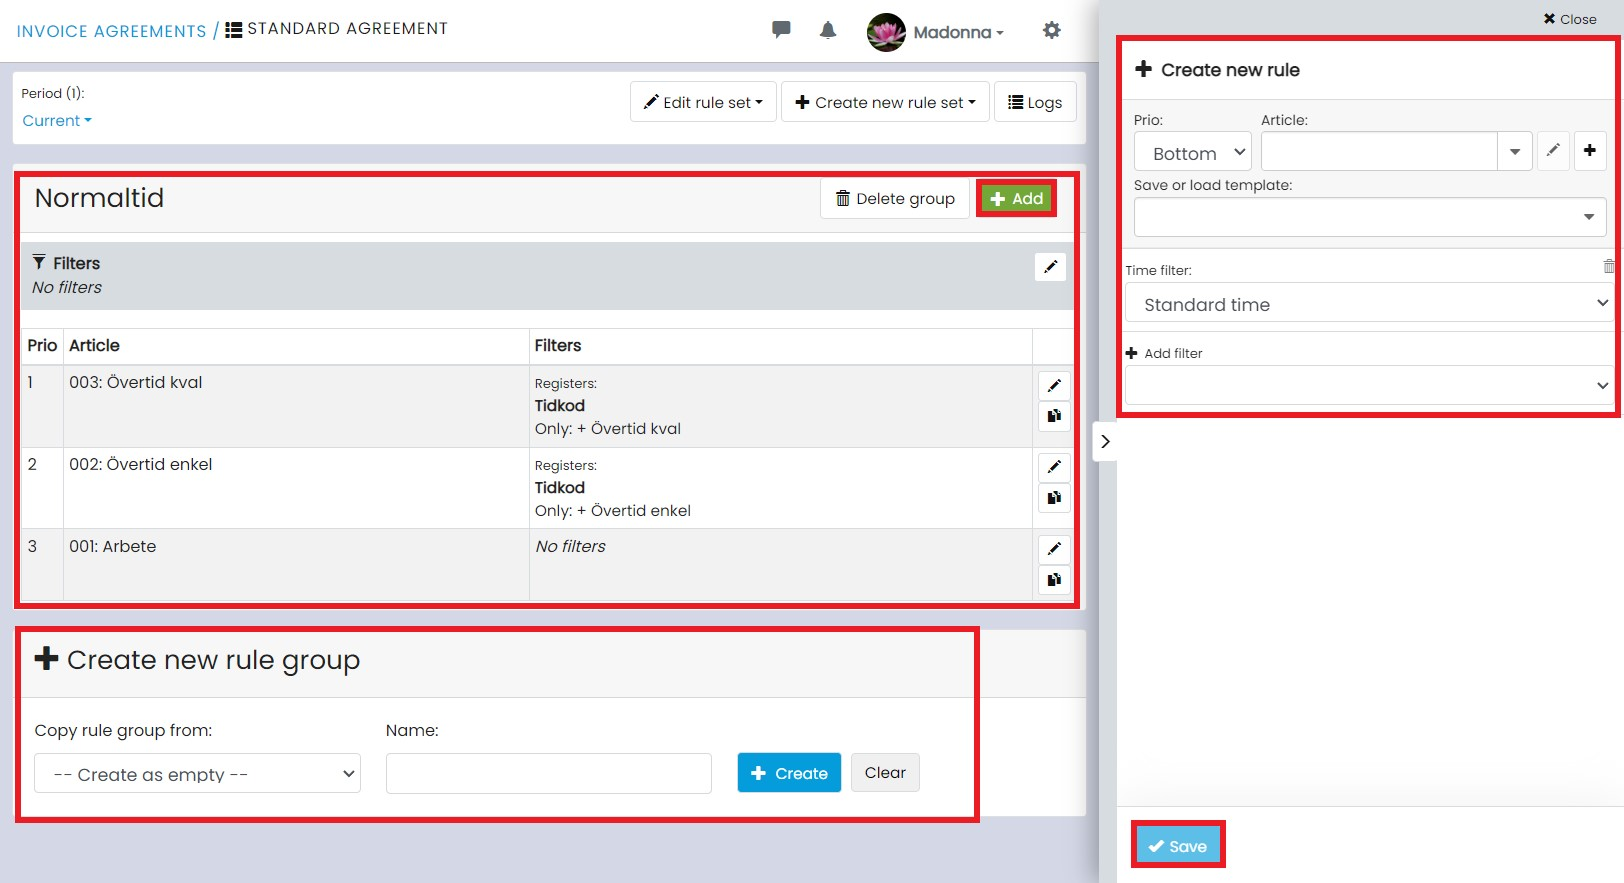
Add an article to the group by clicking on the green button + Add. Select one of the article in the article field, specify priority, choose the desired time selection (working time, breaks, or all), and click Save.
You can also add several other filters:
- Time interval: Specify the start and end time for the rule.
- Weekdays: Choose which weekdays the rule should apply.
- Dates: Select which dates the rule should cover.
- Register: Decide whether the rule should apply to or exclude something from your registers.
- Mandatory tags: Choose a tag that is required for the item to appear on the invoice.
- Holidays: Specify whether the item should apply to holidays.
- Prohibited tags: Choose a tag that should not apply to the item.
- From field: Choose a field from your registers that must have a certain value for the item to appear on the invoice.