
Save and use templates for shifts and schedules
💡Using shift and schedule templates can significantly simplify your scheduling and save valuable time. Below, we will walk you through how to create and use shift and schedule templates so that you can quickly reuse and repeat shifts in the system in a structured and efficient way.
Create shift templates
To create a shift template, you can either create a new shift or start from an already existing one:
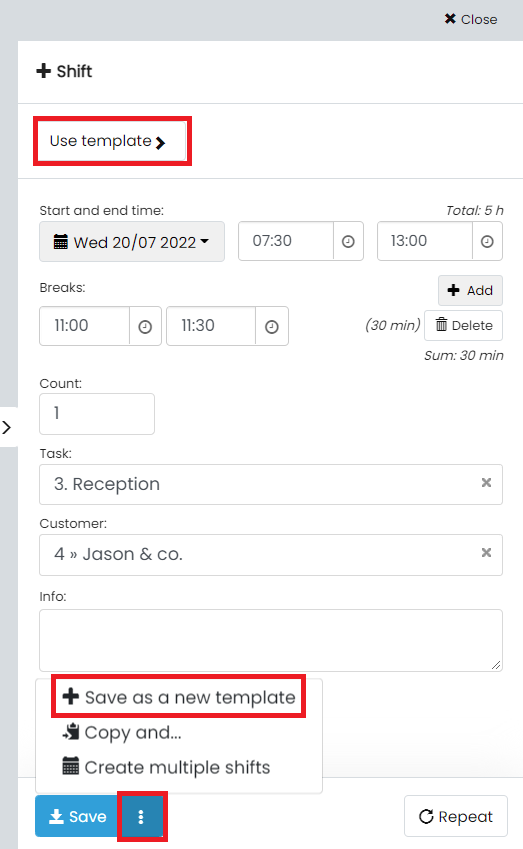
- New shift: Click on the schedule, fill in the necessary shift details, and click on the three dots next to the Save/Book button. Then select Save as new template, enter a name for the template, and click on Save.
- Existing pass: Choose a shift that has already been created, go to the Edit tab, click on the three dots next to the Saved button, and select Save as new template. Name the template and click on Save as a new template.
Next time you create a shift, you can find your saved templates by clicking on Use template at the top of the sidebar.
Create schedule templates
- Click on Select shifts at the top right.
- Select the shifts you want to include in the template.
- Press Create new schedule template, enter a name for the template, and click on Save template.
If you want to select shifts in a more detailed way, you can use the following options:
- Click on the three dots to the left of each row to select or deselect all shifts in that row.
- Click on the arrow next to Select shifts to select all shifts during the chosen time period. You can then deselect the shifts you do not want to include in the template.
To use your schedule template, go to the time period you want to schedule, select Use schedule template at the top right, choose the template, and adjust the start date as needed. You can also specify whether bookings should be included or not. Finally, click on Roll out to apply the template.
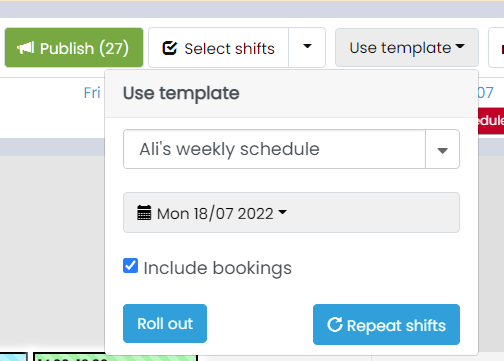
If you want to repeat the template over a longer period, choose Repeat session instead. Here you can specify how often the template should be repeated, as well as the start and end dates, before you roll out the repetition.